Find the right siding rhythm.
Horizontal lap, Dutch lap, vertical board-and-batten and shake-look panels create different rhythms. Compare their scale on a whole elevation and confirm the exact product and accessories for each area.
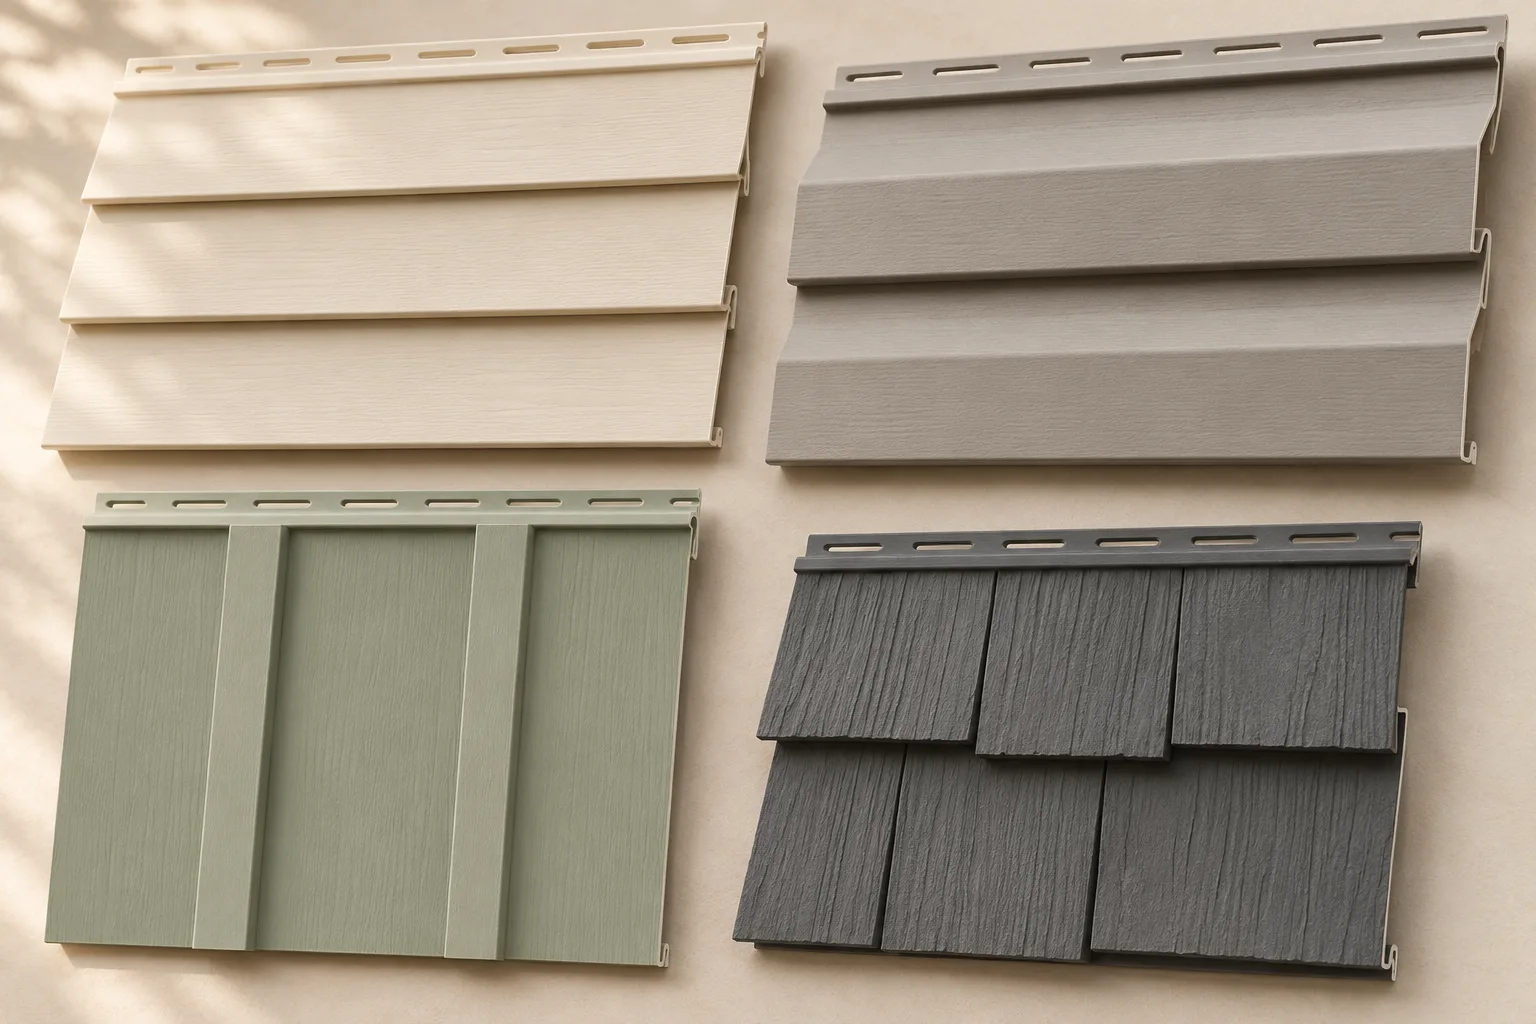 HAUSE visual concept / Illustrative finishes, not a project or product certification.
Horizontal lap
The repeated horizontal line can make a broad wall feel settled and continuous. Look at the visible exposure rather than only the panel’s overall manufactured height. A small sample hides how many lines will cross a full storey. Use the style bench to compare a fine rhythm with a larger one before asking for physical samples.
Dutch lap
A shaped recess near the top of each course creates a stronger shadow. That shadow changes through the day, so compare an actual sample in more than one lighting condition. Confirm the named profile in the quote. Similar-looking photographs can conceal differences in reveal, edge shape and surface texture.
Vertical board-and-batten
Vertical lines draw attention to height and gable shapes. They also change the take-off and installation strategy. Discuss bottom and top details, backing requirements and transitions into horizontal areas. A horizontal-course quantity model should not be used as the final order for a vertical system.
Shake and shingle looks
Short repeated shapes create a finer texture that can work as an accent. Ask how the panel pattern repeats, how edges are finished and whether corner pieces belong to the same system. Evaluate a wider installed sample when possible. A single piece gives little sense of the repeating field.
Use changes deliberately
Place a profile transition at an architectural boundary such as a gable, band or defined volume. Sketch the junction and identify the receiving trim and drainage detail. Random changes introduced to use up leftover material can make an otherwise coherent elevation feel unresolved.
Name every component
Write down the field profile, exposure, colour and texture alongside the corner, opening and transition trims. Ask whether an accent area has its own installation guide and warranty. The finished appearance is the combined result of the field and the way its edges are resolved.
A project conversation
A wide garage wall and a narrow front gable need different visual treatment. Compare horizontal siding on the garage with a vertical accent confined to the gable. Keep the material junction and trim allowance visible in both quotes.
Bring these questions
- What is the visible exposure?
- How does the accent connect to the main field?
- Are matching accessories included?
Read the original guidance
These sources support the principles discussed. Use current instructions for the exact product and confirm applicable local requirements. International technical resources explain mechanisms; they do not establish Canadian approvals.